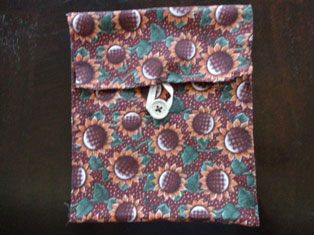
Tired of wasting Ziploc bags? Protect the environment and save some money with the Sandwich Saver Reusable Bag. Made from fabric, elementary-aged children will be able to test their sewing skills with this craft. Once complete, this customizable bag can be used over and over again- when it gets dirty, simply throw it in the wash!
|
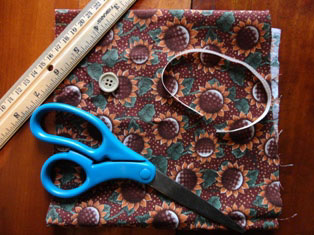
What you'll need:
- 1 piece of patterned fabric (18 inches by 9 inches)
- scissors
- heavy duty thread
- 1 button
- Ribbon (2 inches long)
How to make your sandwich bag:
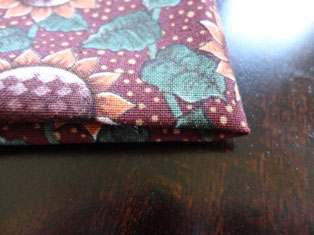
- Using scissors, cut your fabric to the appropriate eighteen inches by nine inches size. On the left side, tuck the fabric in � inch. Then, fold the fabric so that the top of the fabric hangs over by three inches. This will be your flap. Also, make sure that the patterned side is facing inwards. (see photos).
- Thread your needle and begin stitching on the left side where the two fabrics come together. Continue stitching when you reach the flap. When you reach the end of the left side, fold the top part of the flap over � to � inches and continue stitching. (see photos)
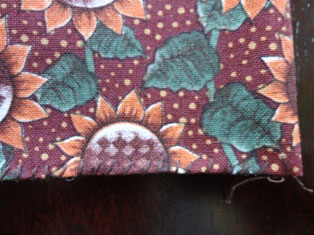
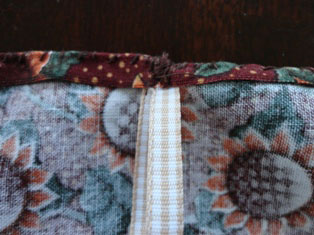
- When you reach the middle of the flap, fold the ribbon in half, tuck it into the flap, and stitch in place ten times until it is secure. (see photos)
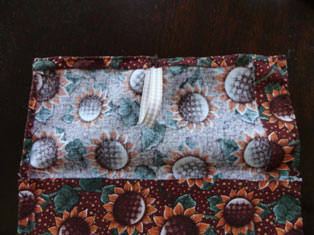
- Continue stitching the top flap and right side of the bag. When you get to the end, stitch ten times in the same place to make sure that the thread is secure. Trim excess thread. (see photos)
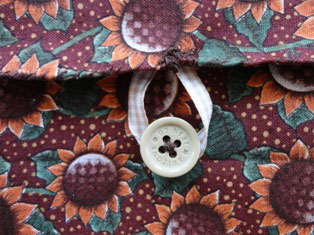
- Fold over the flap and place the button directly underneath the bottom edge of the ribbon, where the ribbon will hook around the button. Sew the button in place. (see photos)
- Your Sandwich Saver Reusable Bag is now ready to store everything from peanut butter and jelly to crackers, Pop tarts, hair ties, and colored pencils. When it gets dirty, hand-wash, or machine-wash on the gentle cycle!
|
![sandwich bag craft]()
![sandwich bag craft materials]()
![making sandwich bag craft]()
![reuseable sandwich bag]()
![kids lunch bag]()
![fabric bag]()
![lunch craft]()
|