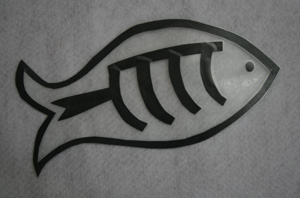
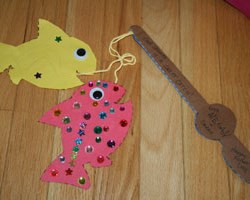
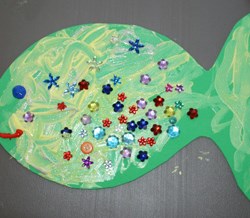
This kids x-ray fish craft was created after reading an alphabet book with our daughter. The book had strayed from the very common "xylophone starts with the letter x" idea and decided to use x-ray fish instead. It was inventive, but my daughter looked at us and instantly asked what an x-ray fish was! Without getting into too much detail we settled on a fish you could see through, except for it's bones. So we decided to craft one to make the idea a bit more tangible for her (plus it fit great into our own alphabet lesson for the week!). This fish craft for preschoolers is fun and different and sure to capture your child's imagination!

What you'll need:

  • Black poster board or heavy construction paper
  • Clear contact paper
  • Scissors
  • X-Ray Fish Template
How to make your kids x-ray fish craft:
  • Print out our X-Ray Fish Template. Cut out the template pieces and trace them onto the black paper. Cut out the pieces. Make sure to cut the center out of the large fish shape so that you are left with the outline only.
  • Cut a rectangular piece of contact paper that is slightly bigger than the large fish outline.
  • Peel the back off of the contact paper. Lay the big fish outline onto the sticky side of the contact paper. Put the rest of the pieces of the fish where they belong in the large fish outline on the contact paper.
  • Cut out a second rectangular piece of contact paper. Remove the backing off the contact paper an stick it to the piece of contact paper that has the fish on it. Be careful as you lay it down so that you don't get too many air bubbles - because once the two sides touch they don't come apart easily!
  • Trim the excess contact paper away from the outline of the fish.
kids x-ray fish craft